
If you're a birding enthusiast, then you know that Africa is a paradise for birdwatching.
This guide shows you how to choose the best camera lenses for wildlife safaris in Africa, with clear focal-length recommendations for big cats, birds in flight, and long-range waterhole scenes. It also includes a simple “one-lens” travel-light decision when you want fewer carry items and less setup time.
On safari, good photos are about more than reach. You’re also managing vehicle comfort, fast-changing light, and wildlife welfare: stay inside your vehicle unless your guide says otherwise, keep a respectful distance, and never encourage animals to approach for better shots.
Safari Lens Fundamentals: How to Match Focal Length to Wildlife
Reach vs. Perspective on Safari
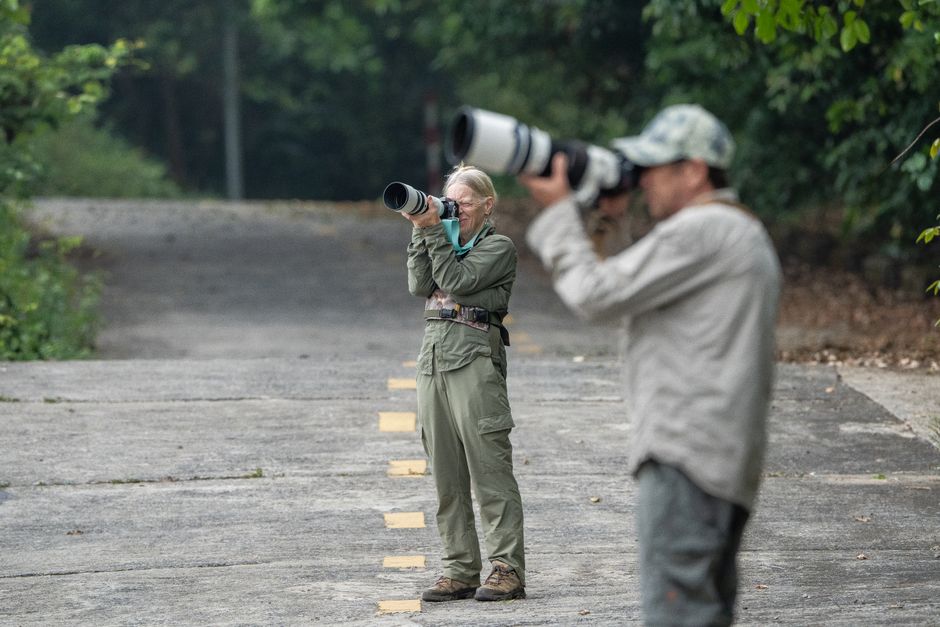
On safari, you rarely get to “walk closer.” That’s why focal length is the key decision. Longer focal lengths (telephoto lenses) help you fill the frame with lions, leopards, cheetahs, and birds without intruding on their space.
As a rule of thumb, think in three outcomes:
- Filling the frame with behaviour (big cats, mammals near cover): you usually want moderate to long reach.
- Capturing birds with detail (especially smaller species): you typically need long reach plus fast focusing.
- Showing the scene at distance (distant waterhole action): you want long reach, but with enough zoom range to reframe quickly.
A helpful mindset: your lens choice should match how far the animals are likely to be from your vehicle, and how much you expect to crop later.
Aperture, Light, and Stabilisation
Safaris run from early morning through late afternoon, when light can be low or change quickly. A wider aperture (smaller f-number) makes it easier to keep shutter speeds high enough to freeze movement.
Stabilisation matters, too. For larger mammals at rest, stabilisation helps keep images sharp. For birds in flight or fast head turns from big cats, stabilisation can help, but the real driver is still shutter speed and reliable autofocus.
Focus Speed and Handling in the Truck
Most wildlife moments happen quickly: a cheetah starts to move, a bird lifts off, a lion turns to face the vehicle. Choose lenses that focus quickly and consistently on your camera system. Also consider how the lens feels when mounted on your body and used repeatedly through the day—on safari you’ll swap between scanning and shooting, so balance and ease of zooming count.
Focal Lengths for Big Cats and Other Ground Predators

Leopard and Cheetah: When You Need Tight Framing
Big cats often appear in patches of cover—acacia shade, rocky kopjes, or bush edges. When the animal is partly obscured, tight framing can still isolate the subject’s eye line and facial features.
For leopard and cheetah, a common safari approach is a 200–400mm range for flexible shooting, paired with the ability to extend reach if your vehicle can’t get close. Many photographers prefer starting in the 300–400mm territory because it’s easier to keep the face large in the frame without constantly cropping.
If your sightings are frequently at medium distance, consider a lens or setup that effectively reaches 400–600mm.
Lions at Water and Thickets: Give Yourself Zoom Flexibility
Lion sightings can be deceptively tricky. One minute the pride is close enough for a chest-and-head portrait; the next minute you’re shooting across a dry riverbed or from behind a stand of grass. This is where zoom flexibility helps.
On routes where vehicles stop at varied angles—such as around Maasai Mara National Reserve and Serengeti National Park—a lens that can go from roughly 100–300mm or 200–400mm (depending on your camera and preferences) lets you reframe without missing the moment.
A Practical Big-Cat Focal-Length Map
If you want a simple guide that works across different parks (and different distances), use this baseline:
- 200–400mm: a strong all-round range for tight mammals when you can approach to moderate distance
- 400–600mm: when animals are consistently farther away or you want more frame-filling detail
- 100–200mm (optional): helpful for story shots that include context, especially if you also photograph wider scenes
Where this plays out clearly: in Kruger National Park and Etosha National Park, big cats may come out at different distances depending on heat, cover, and water availability—so the “in-between” zoom range often earns its place.
Long-Lens Options for Birds in Flight

Birds on Shores and Rivers: Prepare for Small, Fast Subjects
Birds tend to be smaller than mammals in the frame, and they don’t always cooperate with your plans. When the action is along water edges—think rising steam, ripples, and sudden perch changes—you’ll want reach and cropping flexibility.
An example species that benefits from longer telephoto is the African fish eagle. Another common birding target, the lilac-breasted roller, also looks dramatically better with tight framing because head patterns and colour stand out more at longer focal lengths.
In wetland-heavy areas such as the Okavango Delta, wildlife viewing can mean both long waits and sudden take-offs. Plan for fast autofocus and enough zoom reach to keep the bird large in the frame.
Tracking in Flight: Focal Length Matters, but So Does Shutter Speed
When a bird lifts off, your job is tracking and timing. Long focal lengths magnify small tracking errors, so the best lens setup is one you can hold steady and focus confidently.
A typical safari solution is 400mm and above for birds in flight, with 500–800mm often being ideal if your vehicle position keeps subjects at a distance. If your camera has strong autofocus tracking and you can shoot at high enough shutter speeds, longer reach gives you more detail in the final frame.
If you’re using a shorter telephoto, rely more on cropping and on shooting only when the bird is large enough in the viewfinder. Still, be mindful: aggressive cropping can’t replace sharp focus and correct exposure.
Extra Reach vs. Cropping: How to Decide
A practical decision rule:
- If birds are frequently far away (typical on open water or wide floodplains), prioritise more reach.
- If birds are often close enough for a satisfying frame, less reach with more zoom flexibility can be easier to track.
For many travellers, a moderate telephoto with good autofocus can feel more manageable day to day. But if your goal is frequent, detail-rich bird images, aim for a lens that naturally puts you in the long-reach zone without requiring you to crop heavily.
Long-Range Waterhole Scenes and Distant Behaviour

Distant Behaviour Shots: Why Telephoto Helps
Waterholes turn into stage sets: animals arrive, pause, drink, and react to each other. Even if the action is clear to the naked eye, photography changes the challenge—distance makes the subject tiny.
For long-range waterhole scenes, you typically want telephoto reach that lets you isolate key moments: an elephant lifting its head, a giraffe changing posture, a bird landing on the edge.
In reserves where you often see animals at a distance, such as Chobe National Park and Hwange National Park, a long lens helps you keep the subject sharp even when the vehicle can’t reposition quickly.
When to Go Wider: Context Can Be the Whole Point
Not every successful frame is a tight close-up. Sometimes the story is about relationship and setting—who is at the water, how the light looks, and what else is happening around the scene.
A wider lens (or just zooming out) can help you capture the “stage,” then you can switch back to telephoto for details. If you’re packing only one lens, this becomes a balancing act, and the focal-length range you choose should reflect how often you want context.
Telephoto vs. “See the Story” Frames
For waterhole photography, telephoto gives subject detail; wider views give narrative. A good safari rhythm is to spend time scanning with a comfortable focal length, then zoom in when something changes.
That approach works for big, obvious subjects like elephants and giraffes, but it’s also useful for smaller wildlife and for behavioural sequences when animals shift position between drinks.
The One-Lens Safari Kit: A Simple Decision for Travel Light
The Best Single-Lens Choice (Focal Length)
If you truly want the best lens when you bring only one, the goal is compromise without becoming frustrating. The best single-lens focal length on safari usually needs to cover both medium-distance mammals and distant scenes.
A widely practical “one-lens” focal-length choice is a 100–400mm or 200–600mm style lens (equivalent to your camera’s format). Here’s why:
- 100–400mm gives flexibility for framing mammals closer to the vehicle and still offers enough reach for many distant sightings.
- 200–600mm leans harder into wildlife detail at longer distances, which can be great for birds and far-off waterhole action, but may feel limiting when you want wider environmental context.
If the trip focus is mixed wildlife (cats, general mammal sightings, plus occasional birds), 100–400mm often feels like the most balanced. If birds and distant waterhole detail are primary, 200–600mm is often the more satisfying starting point.
What to Pack With One Lens (and Still Stay Safe)
Keeping travel light is also about operational ease. Less gear means fewer things to drop, fewer delays during spotting, and less time with equipment blocking movement.
Pack smart, but also follow safari rules: keep the vehicle guidelines, avoid standing up or leaning out beyond what’s allowed, and never rush animals.
- 1 camera body with charged batteries
- 1 lens chosen for either 100–400mm (balanced) or 200–600mm (reach-first)
- A sturdy strap you can manage one-handed while seated
- Lens cloth (humidity and dust happen)
Ethics and Safety With Any Setup
Even the best lens can’t fix unethical behaviour. Good wildlife photography starts with respect and ends with animal comfort.
Follow these practical safety and ethics checks throughout your drives:
- Stay within the vehicle rules and keep movement smooth when spotting and shooting.
- Do not chase for photos. If the guide says the animal is stressed or changing behaviour, stop shooting and wait.
- Protect your focus on welfare: fill the frame with distance, not pressure.
Overall, choosing the right focal length for the type of safari wildlife you expect—moderate-to-long reach for big cats, long reach for birds, and strong telephoto reach for distant waterhole stories—will improve both your results and your ability to stay calm and respectful. When you travel with one lens, pick the range that matches your most common sightings, then use a steady scanning-to-zoom rhythm to avoid missing the best moments.
Leave a Reply