
If you're planning night drives for big cats, then you already know the real challenge is light. Flash-free photography is about working with what you have: moonlight, vehicle lamps, and the brief moments when a lion or leopard steps into view.
This guide covers how to photograph big cats at night without using flash, including camera settings for low light, practical ways to handle motion and focus, and the safety-focused behavior that keeps both wildlife and people comfortable.
Understanding Night Lighting on Safari
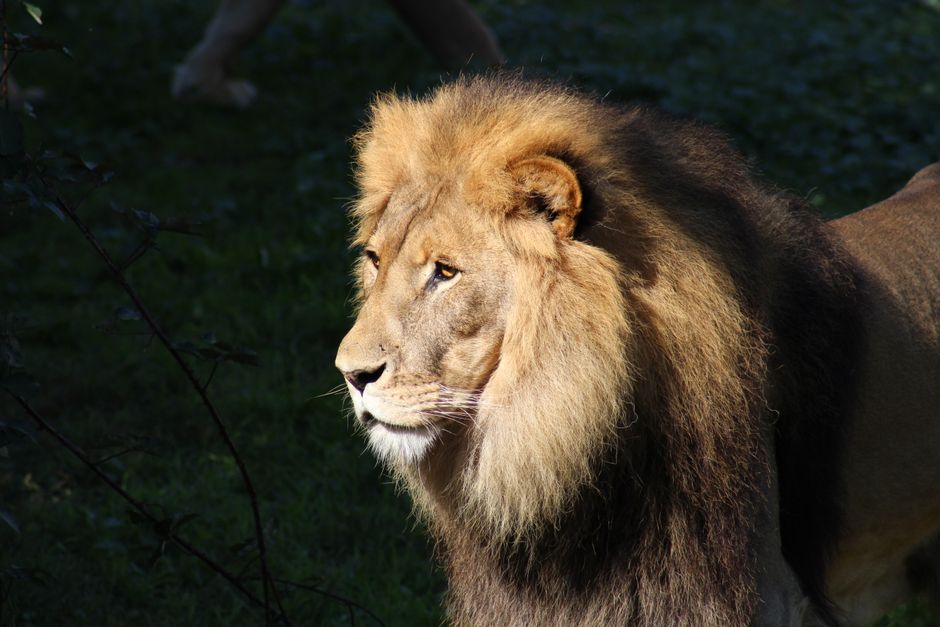
Why flash is a bad fit for big cats
Flash-free photography isn’t just about convenience. A sudden burst of light can disrupt animals, affect natural behavior, and draw attention from drivers and guides nearby. On many safari routes, lighting is regulated and designed to keep disturbance low. By avoiding flash, you reduce the chance of startling a cat, blinding their night-adapted vision, or encouraging repeated approach toward vehicles.
How moonlight and vehicle lights shape your exposure
Night photography is mostly exposure management. You’ll typically rely on ambient sources such as moonlight, star glow, and the controlled beams from the safari vehicle used for viewing. That lighting is inconsistent: a cat might be clearly visible for one second, then fall into shadow as the vehicle angle changes.
To get usable images, plan for exposure that can handle sudden shifts rather than aiming for perfect brightness. The goal is a shutter speed fast enough for movement, paired with an aperture that lets in light, while accepting higher noise as a trade-off.
What big cats do at night (and why it affects your framing)
Big cats at night may be more active in short bursts—standing to scan, walking to scent-mark, or pausing suddenly. Those pauses can be your best chances for sharper portraits, while stalking and pouncing demand faster shutter speeds and continuous autofocus.
When the scene changes quickly, framing accuracy matters as much as technical settings. Pre-visualise where the cat will move next (along a track, toward open grass, or across a rocky edge) so you can react without hunting for composition.
Camera Settings for Flash-Free Night Drives

Exposure mode that gives you control
On most modern cameras, you’ll get consistent results with Manual exposure or Aperture Priority plus exposure compensation—what matters is that settings stay stable as lighting shifts.
A common approach for night drives:
- Choose a wide aperture your lens can comfortably manage (often the lowest f-number available), to gather as much light as possible.
- Keep the shutter speed high enough to reduce blur from walking and head movement.
- Increase ISO as needed to maintain exposure without making the shutter too slow.
If you use a fully automatic mode, the camera may choose a shutter speed that’s too slow for moving cats, or it may repeatedly refocus and refry exposure as the background changes.
Focus settings that work when contrast is low
Night scenes often have limited contrast—dark grass, shadowed tree trunks, and bright vehicle lamps. For reliable focus, use continuous autofocus (AF-C) with a tracking option when available. If your camera offers subject detection (such as animals), use it, but keep expectations realistic: tracking can briefly jump when the cat’s body blends into dark surroundings.
Manual focus with magnification can work if the cat stops and there’s a clear feature (eye line, muzzle, or shoulder), but for moving cats, continuous autofocus is usually faster.
Suggested starting points (adjust to your camera)
Because safari vehicles and environments vary, think of these as starting directions rather than fixed numbers:
- Shutter speed: prioritise something fast enough for movement (for example, action-focused starting points around 1/250s or higher for walking; slower can work only when the cat is largely still).
- ISO: be prepared for higher ISO than daytime wildlife, then balance it against noise reduction preferences.
- Aperture: use the widest practical aperture for your lens, but stop down slightly if your lens is noticeably softer wide open.
To avoid missing the critical moment, set exposure first, then keep your hands steady and adjust only when the cat’s brightness changes (for instance, when it turns toward or away from vehicle lights).
Handling Low Light and Motion in Action Shots

Shutter speed vs ISO: the trade you can control
Blur usually comes from two sources: subject movement and camera shake. On a moving safari vehicle, camera shake is common even with good technique.
A practical balance is to:
- Keep shutter speed high enough to freeze head and body motion.
- Raise ISO to maintain brightness rather than dropping shutter speed too far.
When your images start looking muddy, check whether the shutter has slipped. If it has, boost ISO (or open the aperture) before accepting motion blur.
Burst and tracking for short opportunities
Big cats don’t always give long “photo windows.” In low light, you may need a burst to catch a blink-free expression, an eye catchlight, or a clean walking stride.
Set your camera to continuous shooting mode. Use burst carefully: very large bursts can fill cards quickly, and in the field you may need to delete later. A moderate burst is often enough to capture a sequence while staying responsive.
Reduce glare and bright hotspots
Night drives often include bright lamps and reflective surfaces like dust, wet grass, or rocks. Glare can wash out fur detail and hide the cat’s face.
To improve results without flash:
- Use a lens hood if you have one, and keep your lens angle stable.
- Watch how vehicle lights hit the frame; small movements can change reflections dramatically.
- Avoid pointing directly into the brightest light sources when possible, even if the cat remains visible.
If the cat is near a spotlight beam, expose for the cat’s face rather than the background. A slightly darker background often looks more natural than a blown muzzle.
Safe Viewing Habits When Lights Are Limited
Follow guide lighting rules and positioning
On night drives, guides manage where vehicles stop, how long you stay, and how much light is used. Those decisions protect the animals and other visitors. Always ask your guide what is permitted in that specific area and stick to vehicle instructions, especially regarding headlights, spotlights, and how close you can get.
If your vehicle uses a spotlight or low lamp for viewing, work with that light. Don’t add your own beams, and do not use flash.
Keep distance and avoid crowding
Big cat photography should never require squeezing in closer, blocking the path, or circling the animal. At night, cats may be less visible to other vehicles, and repeated vehicles can increase stress.
Choose respectful behavior:
- Stay in your vehicle (unless your guide explicitly permits otherwise).
- Position for a clear shot without leaning out into danger.
- Keep noise low so you can hear your guide’s instructions and monitor your surroundings.
If multiple vehicles are present, prioritise spacing and quiet patience over chasing a “better angle.” Often, the best images happen when the cat settles again.
Use respectful ethics for wildlife welfare
Night-time sightings can lead to impatience, especially when everyone wants the same moment. Ethics matters more at night because visibility is limited and interruptions can have outsized effects.
Never try to attract cats with calls or lights, and never attempt to track them off the route. If you cannot see the cat clearly, give it time. Many night photos are about waiting through partial views until the cat steps into cleaner light.
For flash-free photography, the safest and most considerate approach is to accept a darker exposure, then improve sharpness with steadier technique and better timing.
Planning Your Best Night-Cat Photos
Where night drives are most reliable
Big cats at night are more photographable in regions where night-time viewing is part of the management plan and where animals are active in open habitats. For example, night drives and low-light wildlife viewing are commonly associated with areas such as Maasai Mara and the Serengeti ecosystem, while leopard sightings often depend on local habitat and timing.
For a wider geographic picture, many travellers also pursue night wildlife viewing in places like Kruger National Park and the broader Okavango Delta region, where lions are frequently encountered and nocturnal activity can be steady.
Species to keep in mind:
- Lions may be more regularly seen on night drives.
- Leopards can be photographed at night, but focus success depends heavily on distance and clarity of visibility.
- Cheetahs are often active during cooler periods, though sightings at night vary by conditions.
Timing, weather, and ground conditions
Low light photography is affected by more than the clock. Cloud cover can reduce moonlight dramatically, while dry dust can create haze that softens edges and increases glare.
On the drive, watch how visibility changes:
- If the background looks too dark, increase ISO rather than switching to flash.
- If dust or mist creates a glowing veil, reduce exposure and protect highlights.
Also consider terrain. If the vehicle is bouncing on rocky tracks, your effective camera stability drops. In those conditions, prioritise faster shutter speeds and rely on higher ISO to maintain exposure.
A repeatable routine to avoid missed shots
When light is limited, consistency is everything. A simple workflow helps you stay ready when the cat finally appears:
- Before the drive (or at the first likely sighting), set your baseline exposure and AF mode.
- When a cat comes into view, refine framing and then keep your settings steady.
- Shoot a short sequence, then re-check focus and exposure if the cat changes position relative to the vehicle light.
After the drive, quickly review the sharpness of the eyes and the texture of the fur. If images are consistently soft, adjust your focus approach or try a slightly different shutter speed. If images are sharp but too dark, raise ISO exposure slightly next time rather than moving to flash.
Overall, flash-free big cat photography at night comes down to three priorities: use a shutter speed that can handle movement, rely on continuous autofocus and steady handling for low-contrast scenes, and follow your guide’s rules for lights and distance so wildlife stays undisturbed. With that combination, night drives can deliver images that feel natural, respectful, and genuinely thrilling.
Leave a Reply